A start to finish guide to selecting, purchasing and sending your stationery.
Your stationery is an important way to get information out to your guests, track your guest count and determine your guests meal selections. It’s also the first introduction your guests have to your wedding and sets the tone for your wedding day style. Choosing your wedding stationery is a big decision! Let us help guide you through it from start to finish. Scroll on!

Save the Dates
Your Save the Dates should be sent out 8-10 months in advance of your wedding date. Get your Save the Dates out on the earlier side if you have a destination wedding or a large number of out of town guests who will need to book travel. Your Save the Dates let guests know they will be invited to your wedding and they should mark your date in their calendar. They should include the below information:
- You & your partners name
- Your wedding date
- Your wedding location (City & State)
- Extra: Include your wedding website if you’ve already created one!
Save the Dates typically end by saying there will be more details to follow, however, it’s okay to skip that line if you’re low on space! It’s pretty self-explanatory that there will be more details on your wedding provided at a later date.
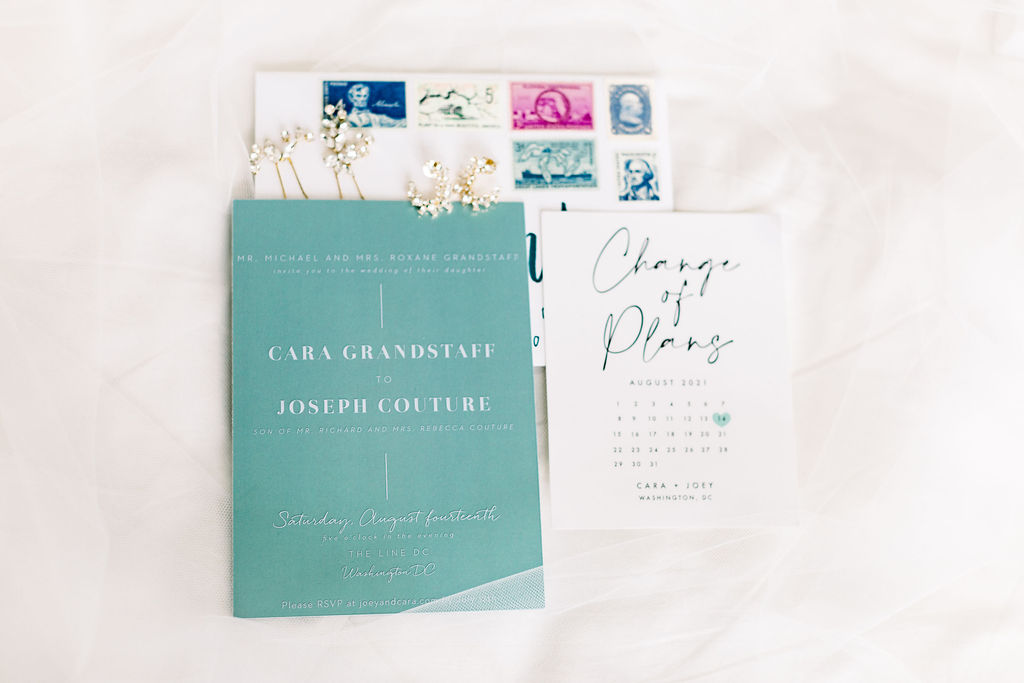
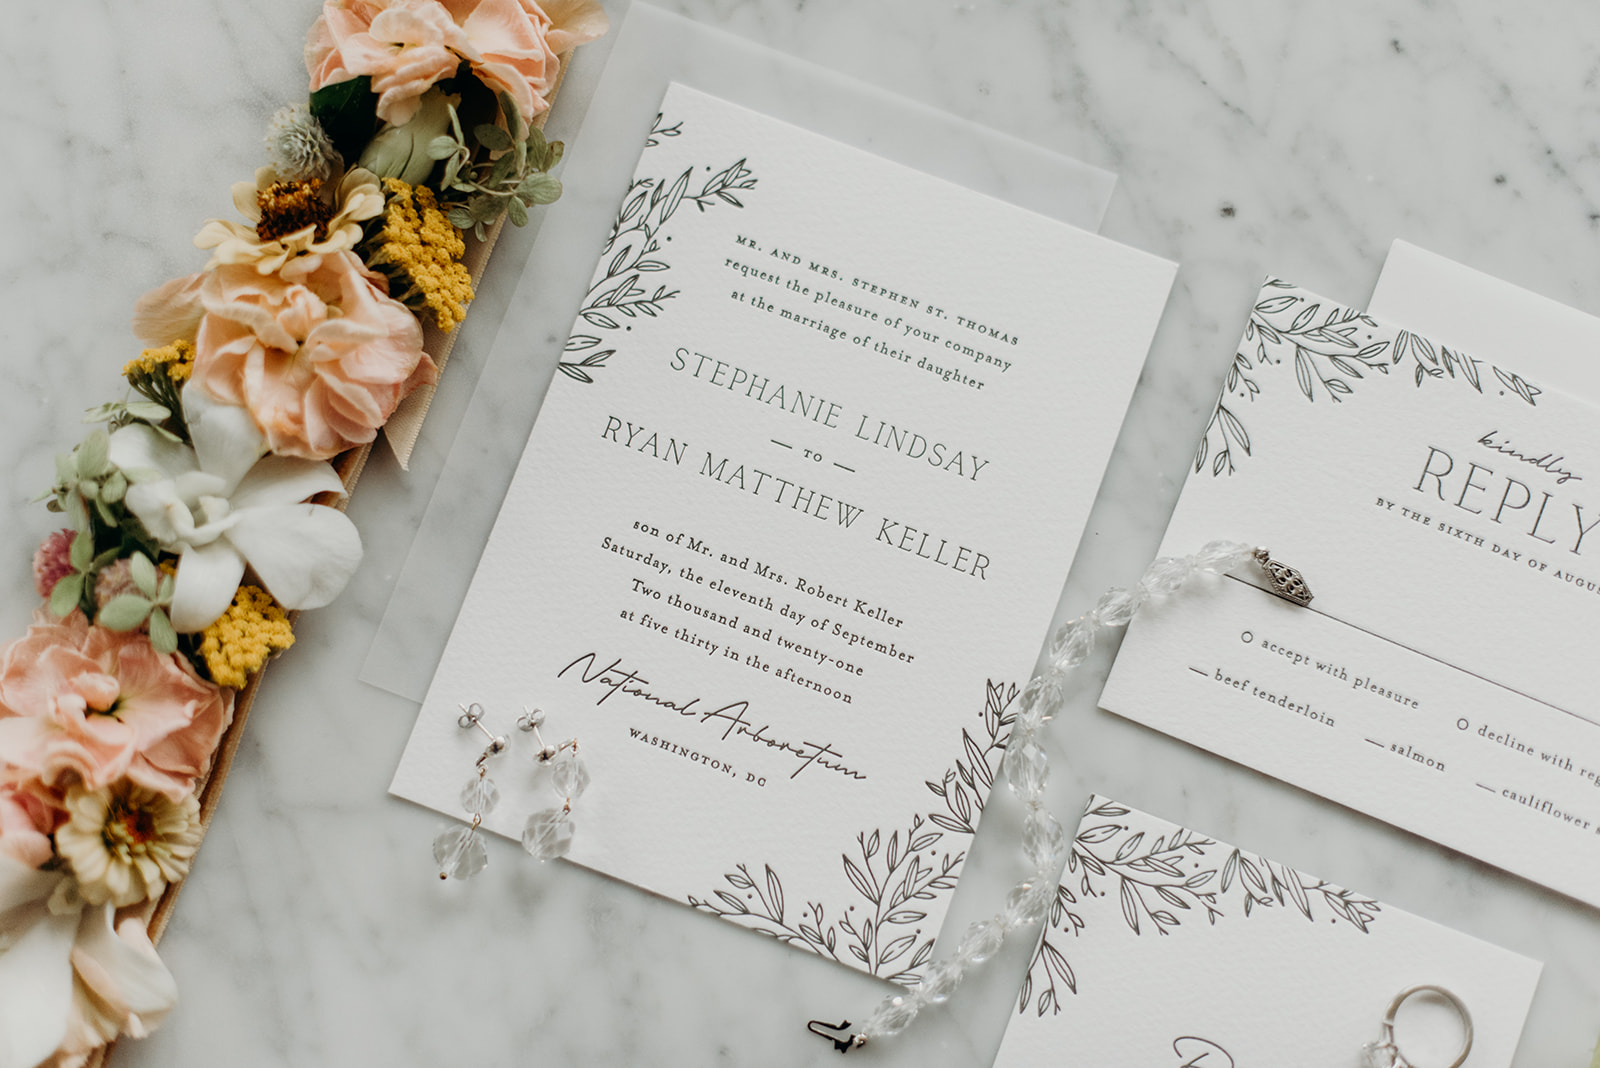
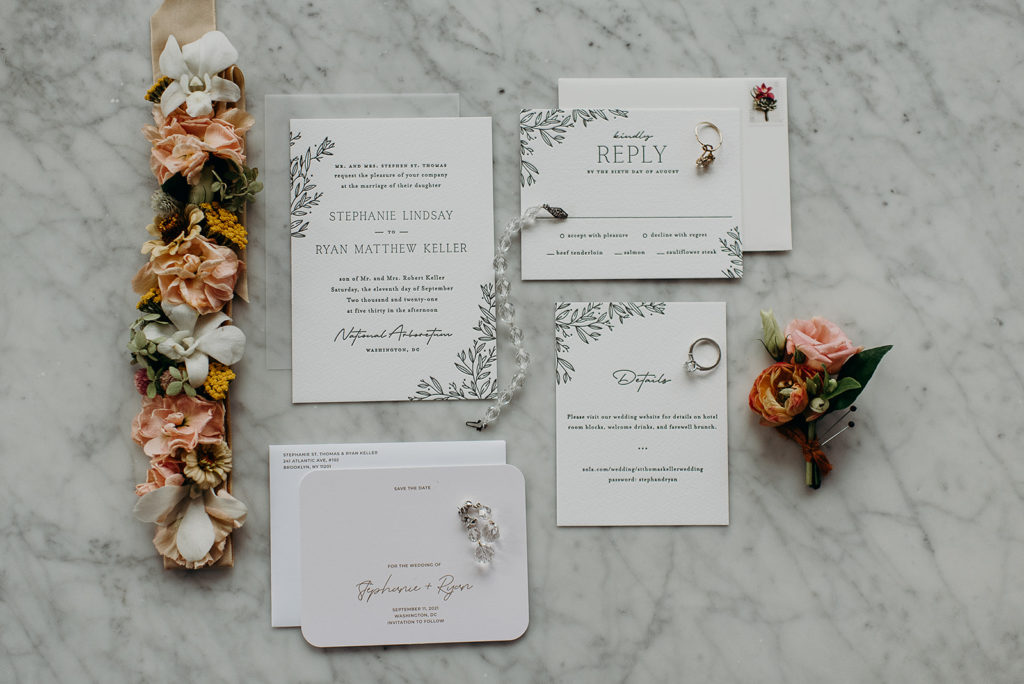
Invitation Suite
Your Invitations should be sent out 3-4 months in advance. Invitation envelopes range from one Invitation card to a suite of 5 cards. How you curate your invitation suite depends on the formality of your wedding and your budget.
- Invitation Card – This is the formal invitation to your wedding and it traditionally includes the following:
- Who’s hosting the wedding
- Who’s getting married
- The date and time
- The name of the venue
- And the city and state of the wedding venue
- If you are not sending a separate RSVP card then your invitation should provide RSVP information
- Your wedding website address
- Detail Cards (Optional) – This acts as a wedding itinerary and provides your guests with more details on the wedding day or weekend.
- Reception Card (Optional)- If the ceremony and reception are not being held at the same location your invitation may include a separate card with details on your reception.
- RSVP Card & Envelope (Optional*)
- Card: RSVP cards are a way to collect your RSVPs and meal selection from your guest. They should have a “reply by” date, and a place for the guest to check “accepts with pleasure” or “declines with regret.” Your reply by date should be at least 6 weeks prior to your wedding.
- Envelope: The RSVP card should also include a stamp on the return envelope for your guests to mail back their replies.
*We have seen a decline in printed RSVP cards as collecting RSVPs online has become more popular. Online RSVPs are more budget-friendly and are easier to track!
- Directions Card (Optional) – Some couples also include a directions card with a map of the venue, town or city they are holding their celebration.
Thank You Cards – Thank You cards should be mailed out to all guests within 2-3 weeks of the wedding. We recommend ordering these in advance (when you order your invitations) and writing and mailing them once you return from your honeymoon.
Tip: Keep track of your wedding gifts as they arrive so you can easily thank the sender in your note.
Choosing Your Stationery Design
There are a ton of stationery options out there and selecting one can be overwhelming. We recommend taking the below things into consideration when selecting your stationery.
- Look at options within your color palette for your wedding.
- Consider whether your wedding is more modern or traditional, formal or casual.
- If you’ve already created your wedding website, stick to the same or a similar font. If you haven’t created a website choose 1-2 fonts and try to use them throughout your stationery, signage, and website design.
- Consider your venue’s locations. If you’re tying the knot in a garden, consider a stationery suite with a hint of botanicals. If your wedding is in an art gallery, go for something more modern.
- Consider adding some extra personality to your stationery with embellishments such as belly bands or wax seals.
6. Use Pinterest to find and save inspiration!
Tip: If you want to get your Save the Dates out the door quickly but you haven’t yet nailed down your wedding style, select a neutral design for your Save the Dates and then follow up with a more stylized Invitation Suite later on.
Looking for some wedding stationery inspiration? Check out our Stationery & Flat Lay Pinterest board.
To Save or Splurge
There is a massive price range when it comes to stationary. We can’t tell you how much you should spend on your stationery without diving into your personal wedding budget. That’s up to you! Below are our tips on ways to save and ways to upgrade your wedding stationery.
Ways to Save:
- Use semi-customizable templates such as those provided on Minted, Zola, and Etsy.
- Collect RSVPs online. You’ll save a chunk of change omitting the RSVP card and the additional envelope and stamp.
- Skip the details, reception and/or directions cards and instead direct guests to your wedding website.
- Avoid gold foil and letterpress options
Ways to Upgrade:
- Partner with a stationery designer to create a custom design
- Go for letterpress or embossed stationery
- Upgrade your envelope with a chic personalized liner
- Add a belly band
- Add a custom wax seal
Where to Start Your Search
Save The Dates & Invitation Templates: Websites like Minted, Zola and Etsy are great places to find semi-custom stationery.
Belly Bands & Wax Seals: Minted and Etsy both offer a wide selection of customizable belly bands. If you want to also add a wax seal to your invitation, we love the easy-to-use (and no mess) wax seal with sticker backs from Artisaire.
Customized Invitation Suites: If you are looking for something more custom we recommend working with a local stationer/calligrapher. Your wedding planner will have recommendations depending on your wedding style and budget!
How to Order
With sites such as Minted and Zola who do in-house printing you will follow the ordering process below:
- Choose a design.
- Customize it with your wedding information.
- Upload your guest list with names and addresses for the envelopes.
- Your invitations will be printed and shipped to you, addressed, and ready to send. Be sure to give yourself a week to a week and a half for them to arrive.
- Bring 1 stuffed envelope to the post office to weigh and determine postage.
- Send out your invitations!
For Etsy, you are typically purchasing a template only and are responsible for finding a local printer. If you choose this route, you will follow the ordering process below:
- Select and purchase an invitation
- Download the template
- Customize it with your wedding information
- Find a local printer (your wedding planner will have recommendations) and send them your template and an excel of your guest name and addresses for the envelopes.
- Go through one round of proofing with your printer.
- Your invitations will be printed and shipped to you, addressed, and ready to send.
- Bring 1 stuffed envelope to the post office to weigh and determine postage.
- Send out your invitations!
For custom invitations, you work with a stationer to come up with a custom design. Each designer’s process will vary slightly and will be discussed with them at the time of booking.
Tip: Remember to order a few extra invitations just in case you’ve left someone off your guest list! You’ll also want an invitation suite and Save the Date for your details photos. And, for an extra special touch, purchase unique or vintage stamps for your envelopes and save a few for your details photos.